
1. Confluent 선택한 이유
- 로컬 노트북에 카프카를 깔고 싶지 않았고..
- 그렇다고 AWS에서 직접 EC2 여러대 만들어서 카프카 클러스터 만들고 싶지 않았음.. 어려우니까ㅠ
- 무엇보다 metric을 확인하면서 병렬처리의 성능을 평가해야하는데 Confluent에서는 이걸 쉽게 확인 가능했음..
- 즉, 내 능력이 부족하므로 플랫폼을 활용하는 것이 효율적이라 생각했음..!
- 가장 중요했던 건... 무료 60일간 400$ 이라는 것.
- 초급자가 카프카 배우기에 안성맞춤 플랫폼
2. 컨플루언트 튜토리얼 찾았음..
자바, 파이썬, Go, .NET, Node.js, C/C++, RestAPI, SpringBoot 등 다양한 언어도 된 튜토리얼 있음.
https://docs.confluent.io/platform/current/clients/index.html
Build Client Applications for Confluent Platform | Confluent Documentation
Programming languages you use to build applications that interact with Kafka provide a set of APIs and libraries. A Kafka client library provides functions, classes, and utilities that allow developers to create Kafka producer clients (Producers) and consu
docs.confluent.io
- 여기서 파이썬으로 된 카프카 클라이언트 문서 따라서 실습해볼 예정.
Apache Kafka and Python - Getting Started Tutorial
How to run a Kafka client application written in Python that produces to and consumes messages from a Kafka cluster, complete with step-by-step instructions and examples.
developer.confluent.io
튜토리얼 따라하기 과정
1. 카프카 클러스터 생성
Confluent Cloud Console에서 클러스터 하나 만든다.

2. 파이썬 프로젝트 생성 및 라이브러리 설치
mkdir kafka-python-getting-started && cd kafka-python-getting-started

# Python 3.x (Install the Kafka library)
pip install confluent-kafka
3. 카프카 클러스터 정보 복사
Confluent Cloud Console 에서 클러스터의 Bootstrap server 의 endpoint 복사해두기

4. 글로벌 키 생성 & config 파일 생성
(1) Key와 Secret 복사하기

(2) config 정보 담긴 파일 만들기
getting_started.ini 파일 만들어서 아래 코드 넣기
[default]
bootstrap.servers={{ kafka.broker.server }}
security.protocol=SASL_SSL
sasl.mechanisms=PLAIN
sasl.username=< CLUSTER API KEY >
sasl.password=< CLUSTER API SECRET >

[consumer]
group.id=python_example_group_1

# 'auto.offset.reset=earliest' to start reading from the beginning of
# the topic if no committed offsets exist.
auto.offset.reset=earliest
(주의)
bootstrap.servers={{ kafka.broker.server }}


# 에러코드
%3|1702203218.131|FAIL|rdkafka#producer-1| [thrd:sasl_ssl://'pkc-e82om.ap-northeast-2.aws.confluent.cloud:9092/b]: sasl_ssl://'pkc-e82om.ap-northeast-2.aws.confluent.cloud:9092/bootstrap: Failed to resolve ''pkc-e82om.ap-northeast-2.aws.confluent.cloud:9092': 알려진 호스트가 없습니다. (after 8ms in state CONNECT)
여기서 { } 중괄호 없고, 따옴표도 없고 키 값만 넣어야 함.
안그러면 인식 제대로 못해서 에러 발생

sasl.username=< CLUSTER API KEY >
sasl.password=< CLUSTER API SECRET >

# 에러코드
%3|1702205150.434|FAIL|rdkafka#producer-1| [thrd:sasl_ssl://pkc-e82om.ap-northeast-2.aws.confluent.cloud:9092/bo]: sasl_ssl://pkc-e82om.ap-northeast-2.aws.confluent.cloud:9092/bootstrap: SASL authentication error: Authentication failed (after 5116ms in state AUTH_REQ, 5 identical error(s) suppressed)
여기도 마찬가지로 < > 괄호 없고, 따옴표도 없고 키 값만 넣어야 함.
안그러면 인식 제대로 못해서 에러 발생

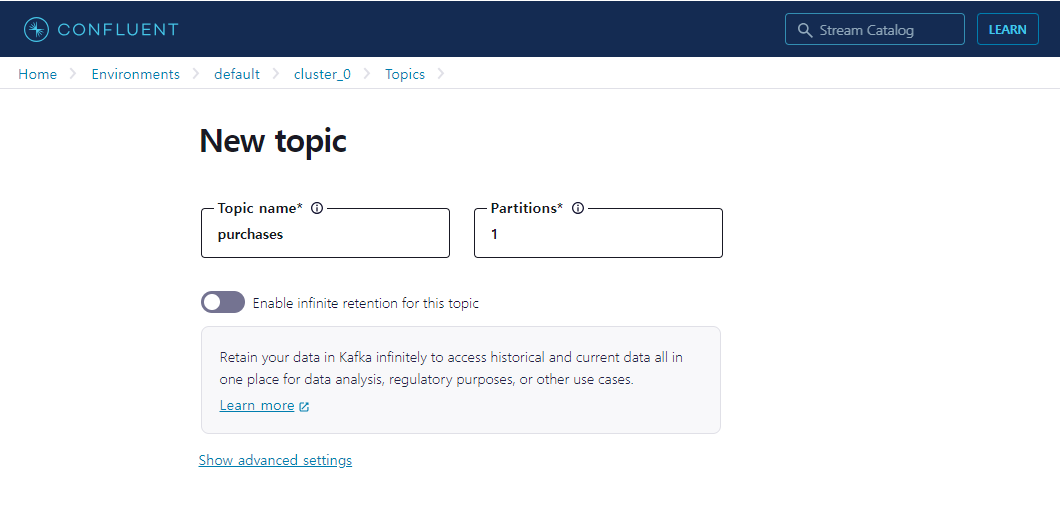
5. 토픽 생성
토픽명은 purchases
파티션 개수는 1개
6. 카프카 프로듀서 만들기
producer.py 파일 만들어서 아래 코드 저장
#!/usr/bin/env python

import sys
from random import choice
from argparse import ArgumentParser, FileType
from configparser import ConfigParser
from confluent_kafka import Producer

if __name__ == '__main__':
    # Parse the command line.
    parser = ArgumentParser()
    parser.add_argument('config_file', type=FileType('r'))
    args = parser.parse_args()

    # Parse the configuration.
    # See https://github.com/edenhill/librdkafka/blob/master/CONFIGURATION.md
    config_parser = ConfigParser()
    config_parser.read_file(args.config_file)
    config = dict(config_parser['default'])

    # Create Producer instance
    producer = Producer(config)

    # Optional per-message delivery callback (triggered by poll() or flush())
    # when a message has been successfully delivered or permanently
    # failed delivery (after retries).
    def delivery_callback(err, msg):
        if err:
            print('ERROR: Message failed delivery: {}'.format(err))
        else:
            print("Produced event to topic {topic}: key = {key:12} value = {value:12}".format(
                topic=msg.topic(), key=msg.key().decode('utf-8'), value=msg.value().decode('utf-8')))

    # Produce data by selecting random values from these lists.
    topic = "purchases"
    user_ids = ['eabara', 'jsmith', 'sgarcia', 'jbernard', 'htanaka', 'awalther']
    products = ['book', 'alarm clock', 't-shirts', 'gift card', 'batteries']

    count = 0
    for _ in range(10):

        user_id = choice(user_ids)
        product = choice(products)
        producer.produce(topic, product, user_id, callback=delivery_callback)
        count += 1

    # Block until the messages are sent.
    producer.poll(10000)
    producer.flush()
7. 카프카 컨슈머 만들기
consumer.py 파일 만들어서 아래 코드 저장
#!/usr/bin/env python

import sys
from argparse import ArgumentParser, FileType
from configparser import ConfigParser
from confluent_kafka import Consumer, OFFSET_BEGINNING

if __name__ == '__main__':
    # Parse the command line.
    parser = ArgumentParser()
    parser.add_argument('config_file', type=FileType('r'))
    parser.add_argument('--reset', action='store_true')
    args = parser.parse_args()

    # Parse the configuration.
    # See https://github.com/edenhill/librdkafka/blob/master/CONFIGURATION.md
    config_parser = ConfigParser()
    config_parser.read_file(args.config_file)
    config = dict(config_parser['default'])
    config.update(config_parser['consumer'])

    # Create Consumer instance
    consumer = Consumer(config)

    # Set up a callback to handle the '--reset' flag.
    def reset_offset(consumer, partitions):
        if args.reset:
            for p in partitions:
                p.offset = OFFSET_BEGINNING
            consumer.assign(partitions)

    # Subscribe to topic
    topic = "purchases"
    consumer.subscribe([topic], on_assign=reset_offset)

    # Poll for new messages from Kafka and print them.
    try:
        while True:
            msg = consumer.poll(1.0)
            if msg is None:
                # Initial message consumption may take up to
                # `session.timeout.ms` for the consumer group to
                # rebalance and start consuming
                print("Waiting...")
            elif msg.error():
                print("ERROR: %s".format(msg.error()))
            else:
                # Extract the (optional) key and value, and print.

                print("Consumed event from topic {topic}: key = {key:12} value = {value:12}".format(
                    topic=msg.topic(), key=msg.key().decode('utf-8'), value=msg.value().decode('utf-8')))
    except KeyboardInterrupt:
        pass
    finally:
        # Leave group and commit final offsets
        consumer.close()
8. 카프카 프로듀서 이벤트 생성하기
chmod 파일 권한변경 명령어
u+x : user에게 excution(실행) 권한 부여 후 파이썬 코드 실행
chmod u+x producer.py

./producer.py getting_started.ini
9. 카프카 컨슈머 이벤트 생성하기
chmod 파일 권한변경 명령어
u+x : user에게 excution(실행) 권한 부여 후 파이썬 코드 실행
chmod u+x consumer.py

./consumer.py getting_started.ini
최종 결과
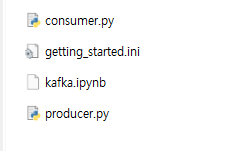
생성파일
출력 화면

'백엔드 > Kafka' 카테고리의 다른 글
| [Kafka] 심화 (병렬처리 / 스트림즈 / 커넥트 ) (0) | 2023.12.10 |
|---|---|
| [Kafka] 개념 (1) | 2023.12.06 |